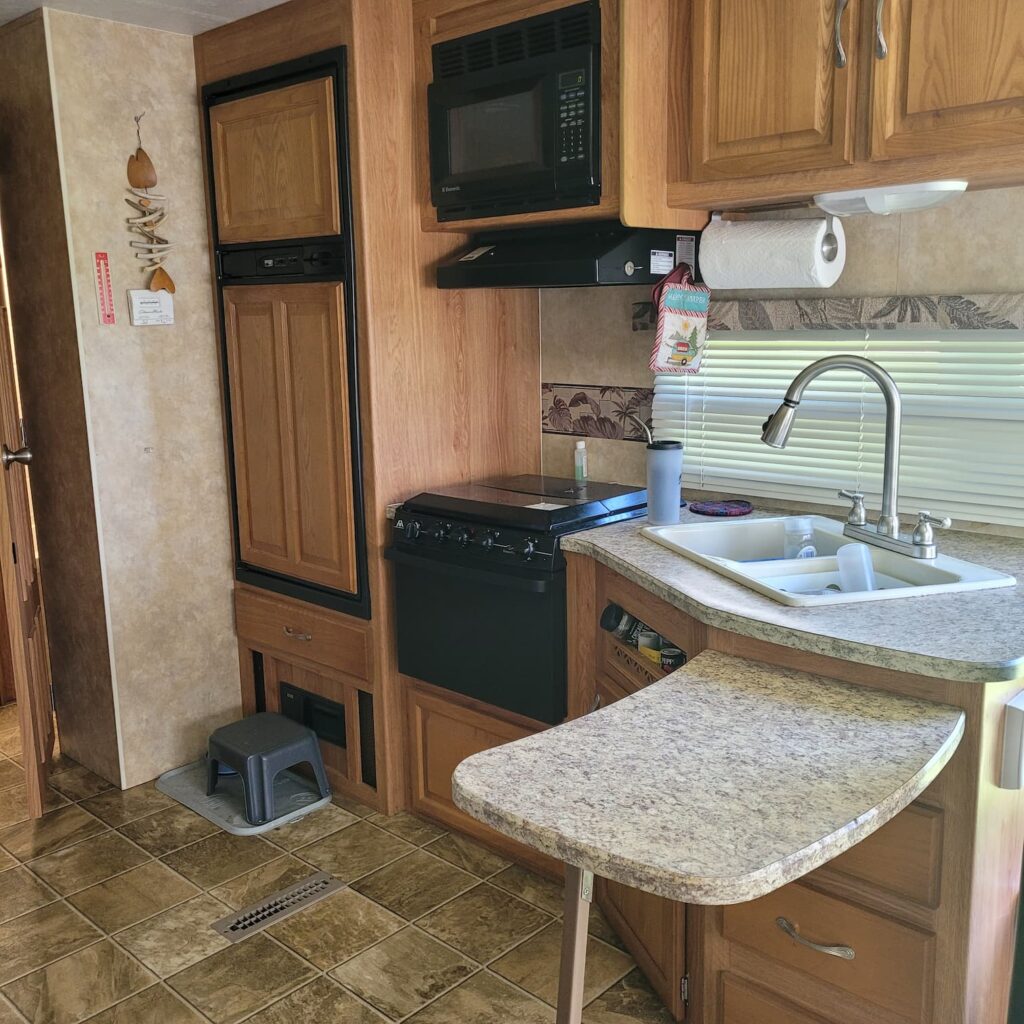
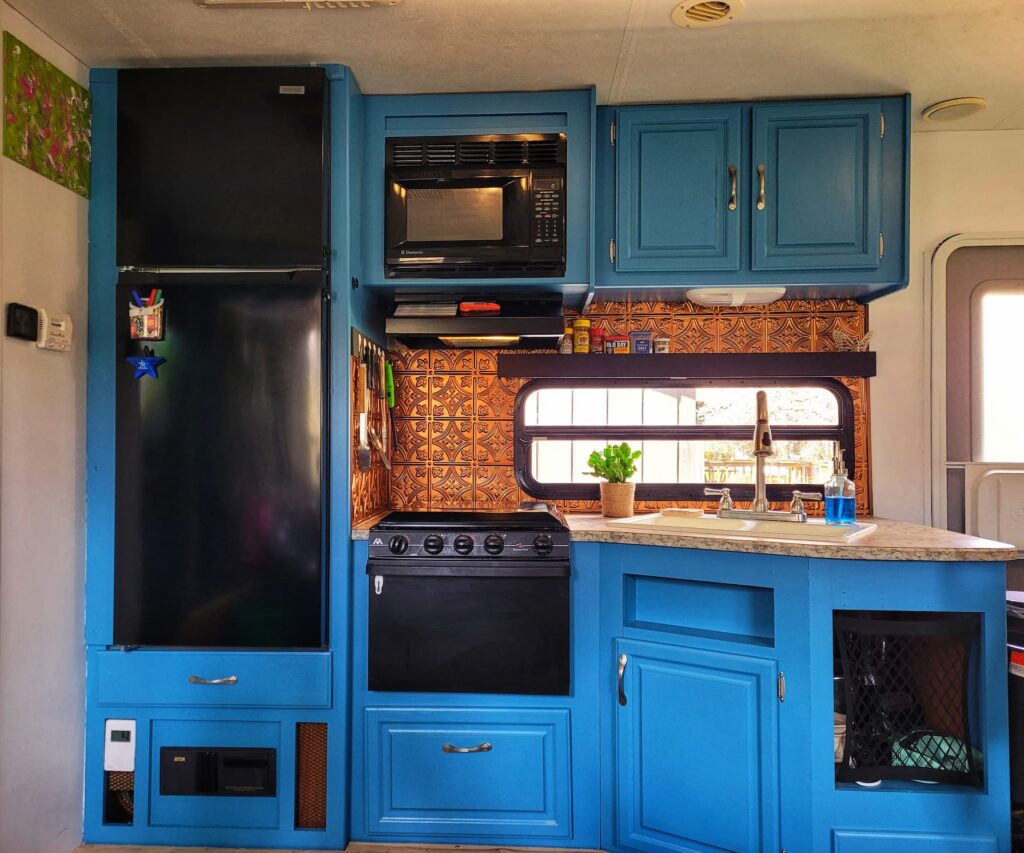
One of the most important spaces we renovated in our RV was the kitchen. Besides being a visually large space, it’s a space we use 3-7 times a day (I’m a snacker). When you use a space that often, you need it to be functional, especially when it’s a small space. It’s hard to fit everything in the small space anyways, so we definitely don’t have room to waste space with things we don’t use or don’t work for us. Our renovation including, painting, adding a backsplash, changing to a residential fridge, building a custom spice shelf window valance, removing drawers, adding an island cart, and so much more.
As an Amazon Associate I earn from qualifying purchases.
8 RV Kitchen Renovation Projects
Painting RV Kitchen Walls & Cabinets
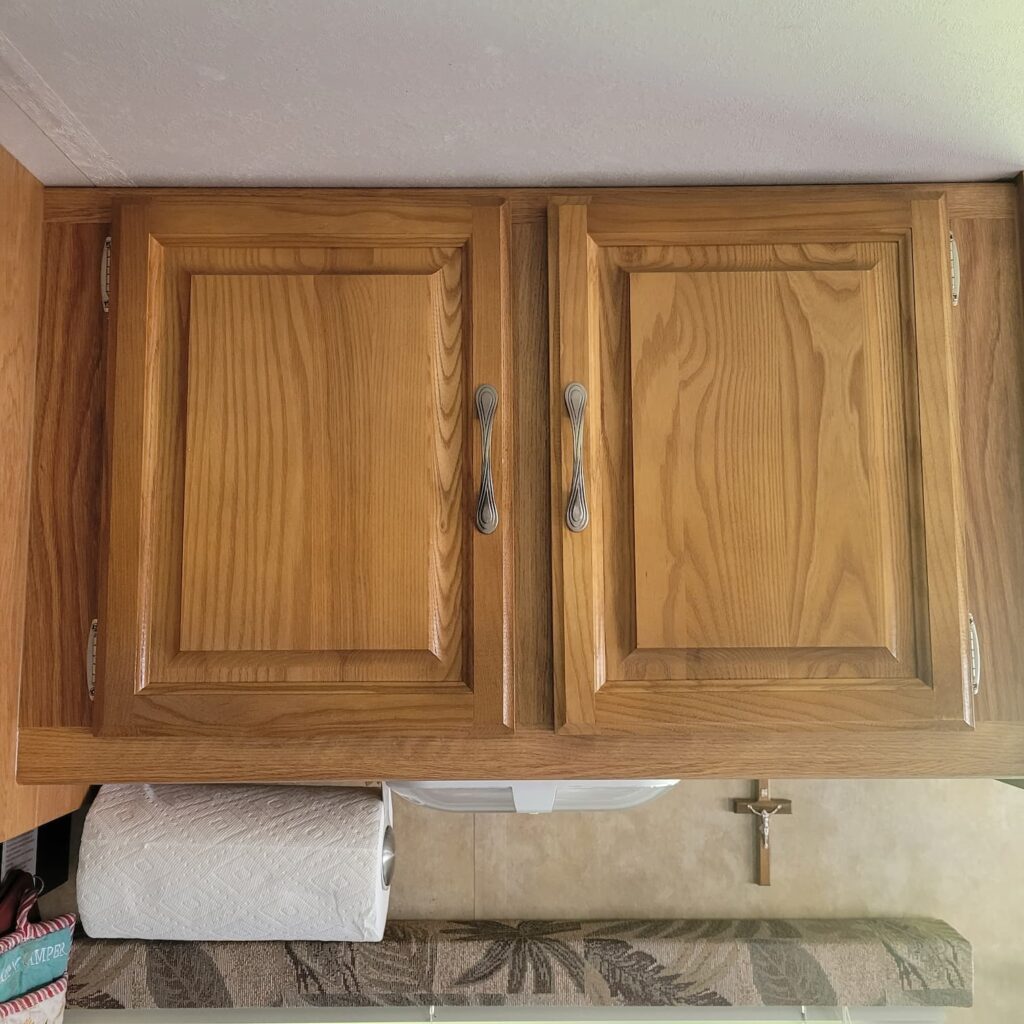
One of the most visually impactful things we did was painting the kitchen. Our cabinets before actually weren’t too bad, they weren’t as orange-y as a lot of cabinets from that era. We still wanted something more fun and our style. We used the same blue for all our cabinets in the main living area (over the desk, over the couch, and the reptile area). Originally we wanted a more teal-y/turquoise-y blue, but then we found this blue paint in the mistints section at Home Depot for $9. The walls are all painted a plain white. We found this paint at Farm and Fleet for crazy cheap. The store was clearing out this particular line, so it was on sale for buy one get free.
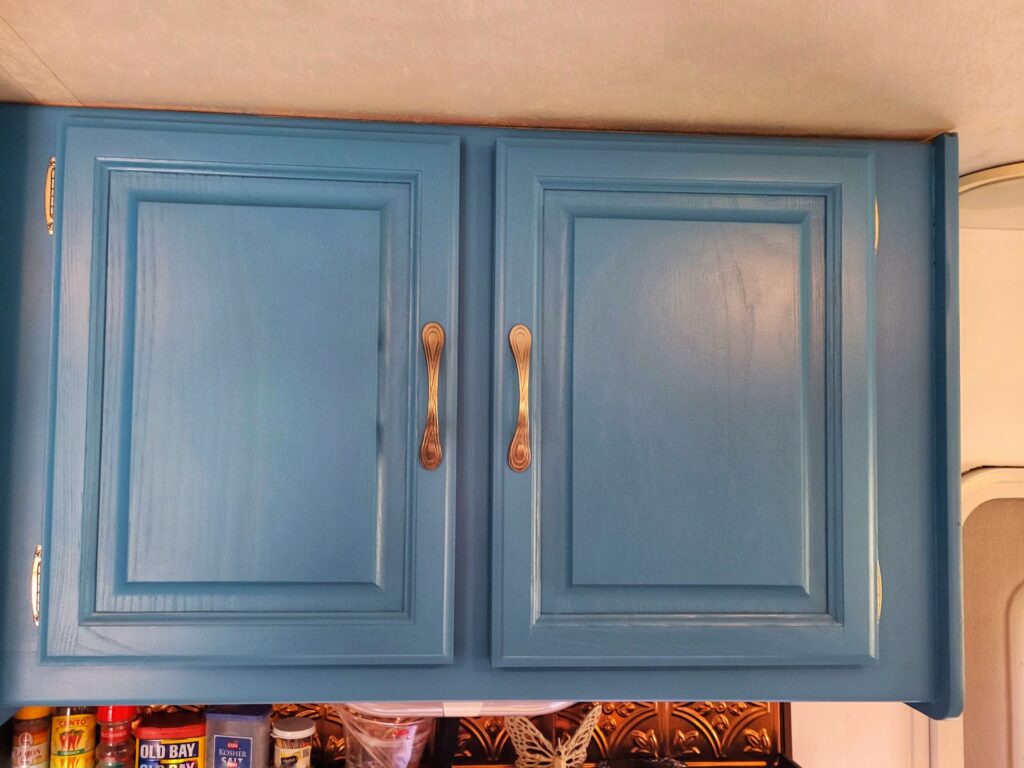
Before starting this part of the project, we did a lot of research into what we needed to do to prep for painting RV walls. We read a mix of people who did a ton of prep work and others who just slapped up the paint and said it was fine. We landed in the middle. For walls, we did a light sand- nothing crazy or precise, just enough to scratch up the walls. Then we wiped them down with TSP. For cabinets, we took off the doors and sanded everything as well. We did this renovation during the winter, so it was nice to be able to take cabinet doors and drawers into the garage to work.
Adding a Faux Copper Backsplash
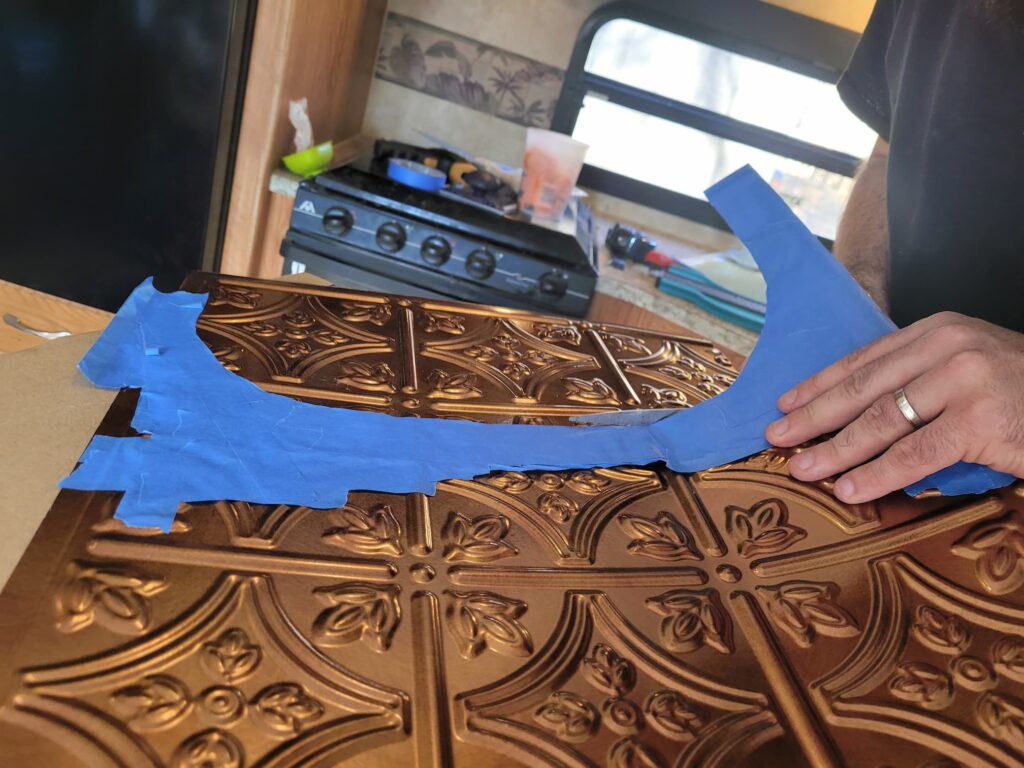
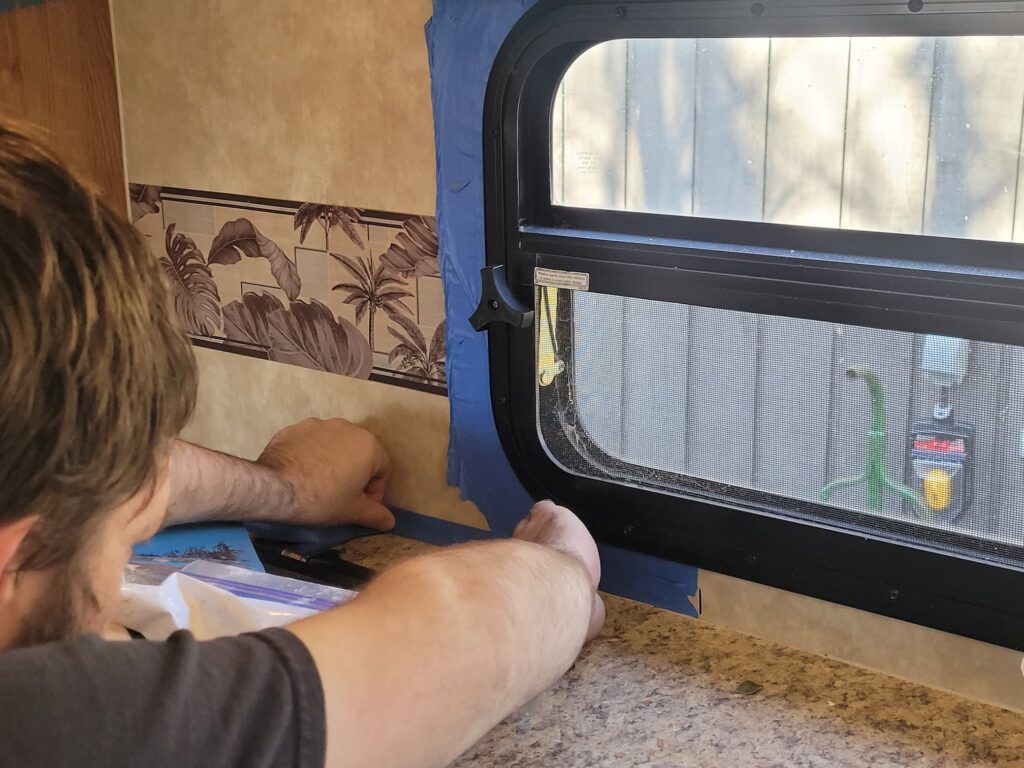
I am in love with our backsplash we added! We found these faux copper tiles at Menards. They’re plastic and super lightweight- something very important for RV renovations. They were a little pricier than we wanted. It was at a price point that if we were doing only a kitchen renovation, it would have been no big deal, but since we were remodeling the whole RV at once we couldn’t justify it. But we kept an eye on it for sales and then I ended up getting them for Christmas. Josh installed the backsplash, which meant trimming and piecing tiles together to fit around the window and stove hood. He showed me a neat trick he used for trimming around windows, which have curved edges. Basically, he created a jig out of painter’s tape. He put the tape on on the wall and layered it into a sheet, tracing around the window. He was then able to take it off and use it as a template for cutting the tile. Once everything was trimmed and dry fit, he attached the tiles with heavy duty Liquid Nails.
Removing Kitchen Drawers to Find Hidden Space
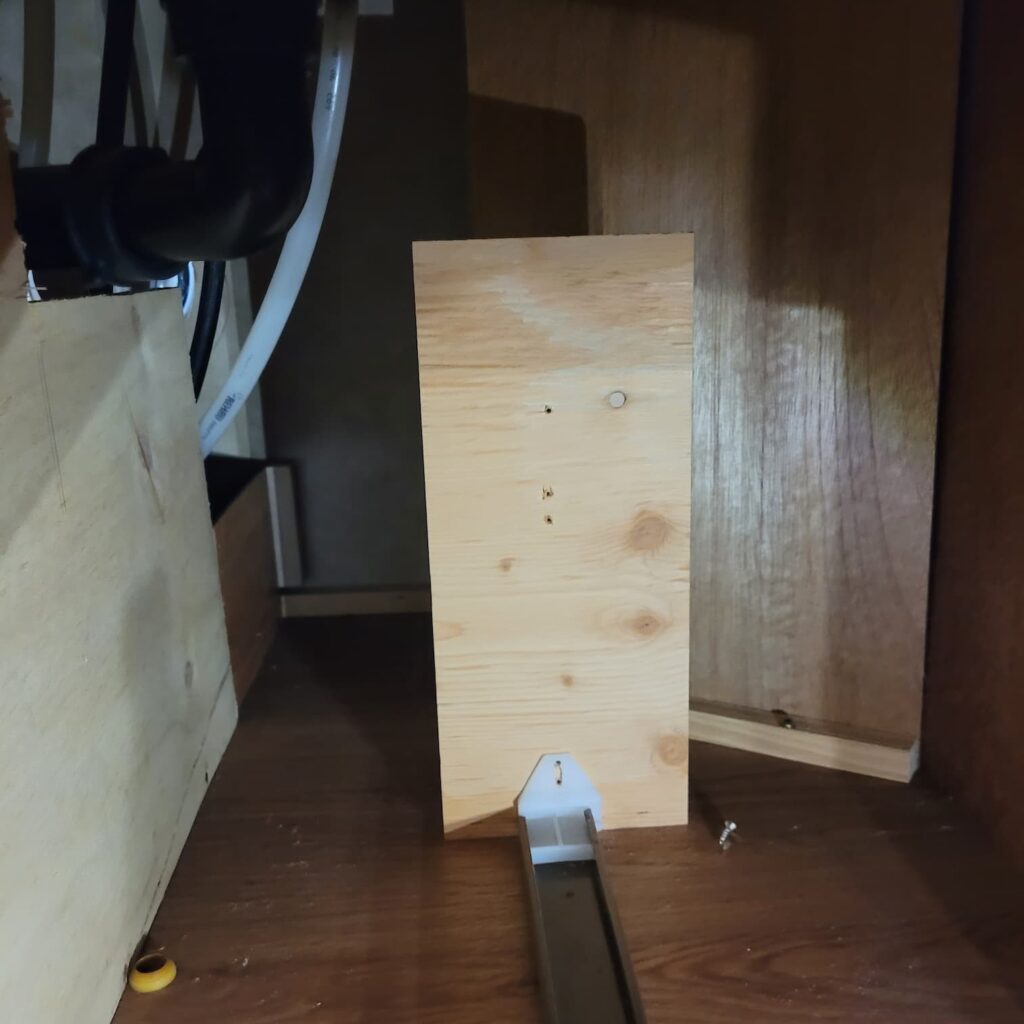
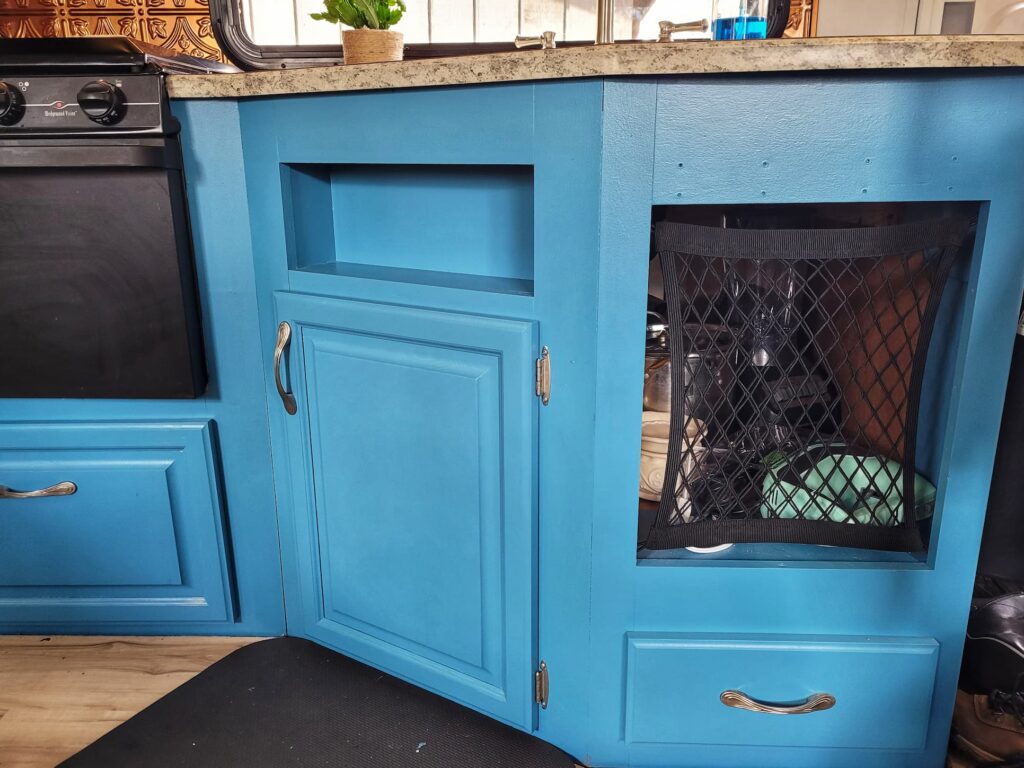
One of the first things we did in the RV kitchen renovation was changing up the storage in this corner area. It was a day when we were doing little things here and there and on a roll of removing extra weight and finding hidden storage space. We realized that behind the three drawers there was a ton of hidden space! So we decided to remove the top two drawers to open it up as a cabinet. We use this space to store bulky stuff like large pots, the blender, our mini Crockpot, etc. To keep things secure when moving, we added screws on the inside of the opening and hung up one of these cargo nets (we’re obsessed with these nets and want to use them everywhere now).

Changing from an RV Fridge to a Residential Fridge
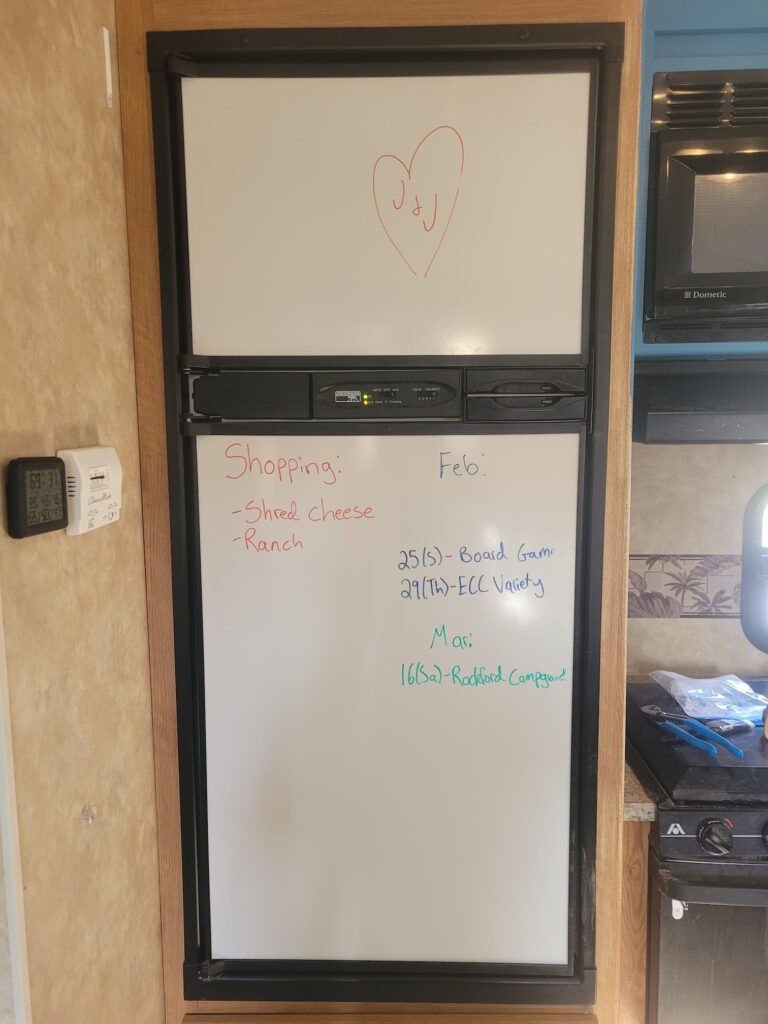
We started our fridge journey with debating on what color to paint the fridge. If we painted it blue, would it be too much? Should we find a contrasting color? We solved that problem when Josh realized he could take out the panels from the front. We replaced them with Dry Erase Handi-Panels cut to size. This was awesome! Except then the fridge died and we had to replace it totally. Of course.
The cooling unit of the fridge died. This was totally stressful and felt like we were going backwards instead of forward with our kitchen renovation before hitting the road. We considered all the options. We could repair the fridge for $500-800 (for parts alone!), buy a new RV fridge for $1,000-2,000, or buy a residential fridge for around $300-500. As much as the cost difference was looking good for getting a residential fridge, we were worried about it not being able to run on propane and fitting it into the RV. We still ended up deciding it was the only option that financially made sense.
The Challenge: Finding a Residential Fridge that Works in Our RV
Then we were onto the next issue- finding a fridge that would fit in our space, since the original fridge was built into the cabinetry. And oh boy was this a challenge- especially because all the small fridges had teeny tiny freezers. We looked at so many where the overall size was 3-4 cubic feet bigger than the old fridge, but the freezer was smaller. The proportions were all so bad. We finally found the Vissani 10.1 cubic foot fridge and it actually has a bigger freezer than our old one, and just barely fit into our space! Before purchasing, we wanted to see it in person at Home Depot, but they only had it in a box. We asked an associate if there was an open one because we wanted to actually measure it. So she looked at the box and read us the measurements.
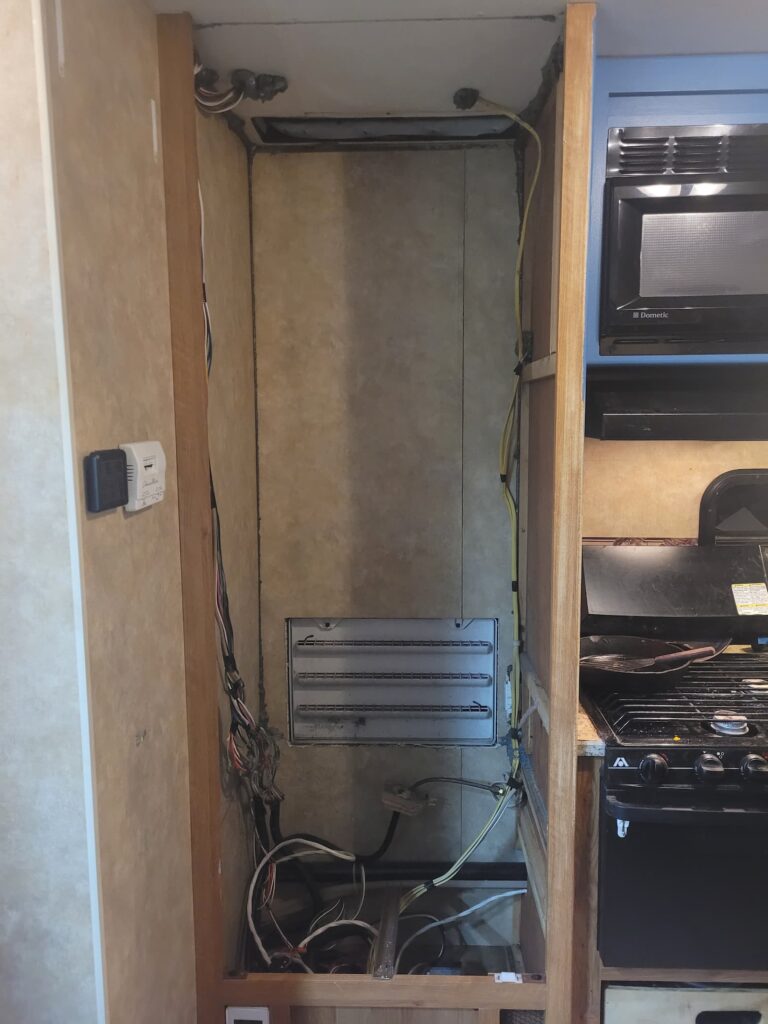
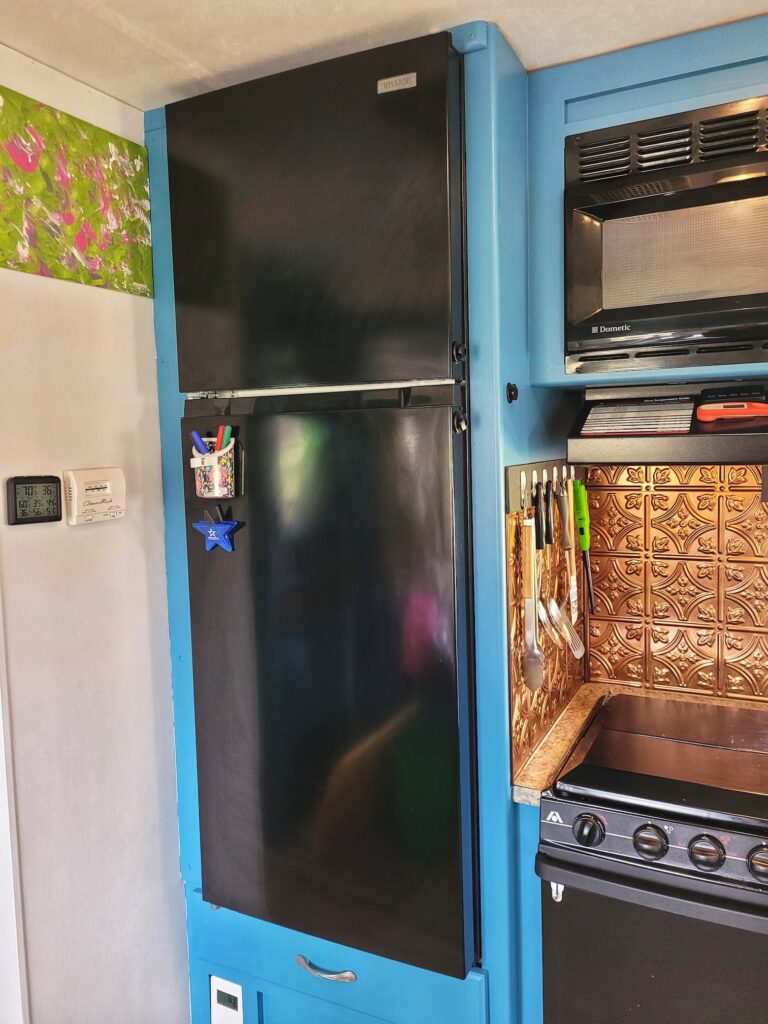
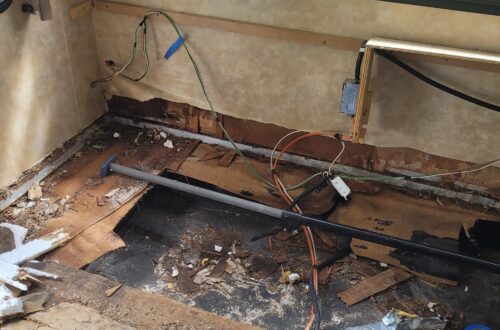
We decided to pull the trigger on it anyway and hope that the measurements were accurate- surprise surprise they weren’t and it was a tighter fit than expected. Fitting this fridge into place was a bit of an ordeal. We tore out the old cabinetry around the fridge and Josh even had to lower the drawer under the fridge (besides not wanting to lose the storage space, this is the access point to a lot of the electrical underneath). He added in extra support beams underneath the fridge too. Once it was in place, he framed out around it. When we drove to the CAT scales to weigh the rig, it also was our first drive test with the new fridge- and it survived! We still worry that over time we could have problems, since it’s not meant to bounce down the road like an RV fridge is- but fingers crossed it will be ok.
RV Kitchen Faucet Upgrade
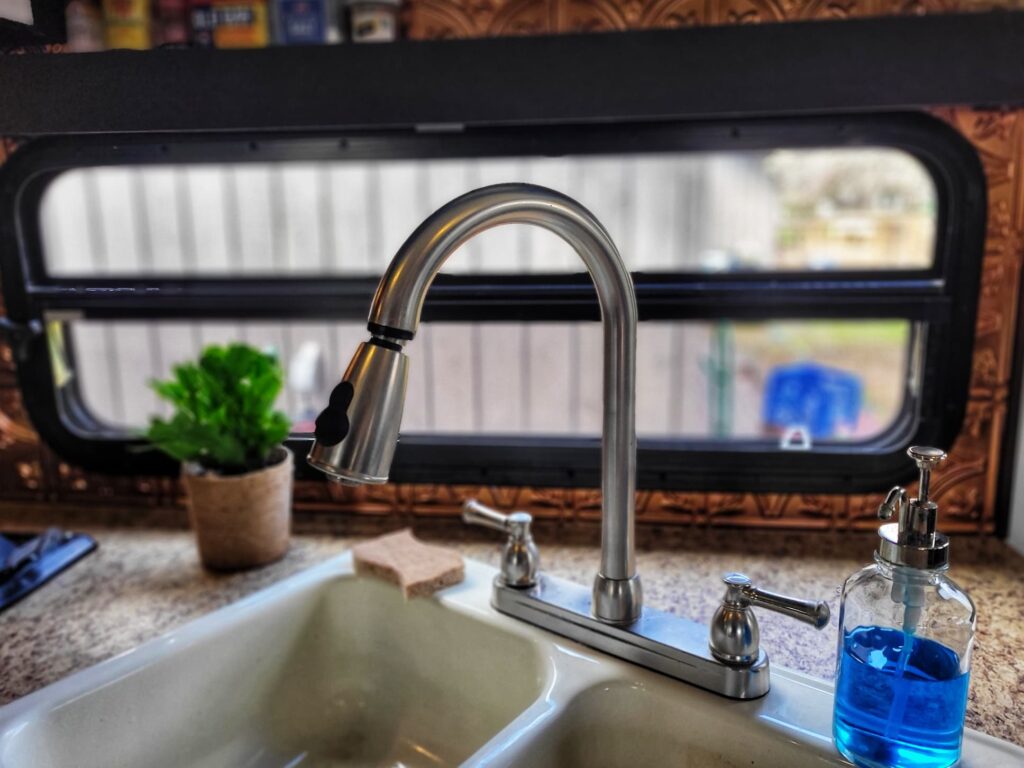
One upgrade we actually did a while ago was to replace the kitchen faucet. We found this faucet which has a more residential look to it- but is still very lightweight.
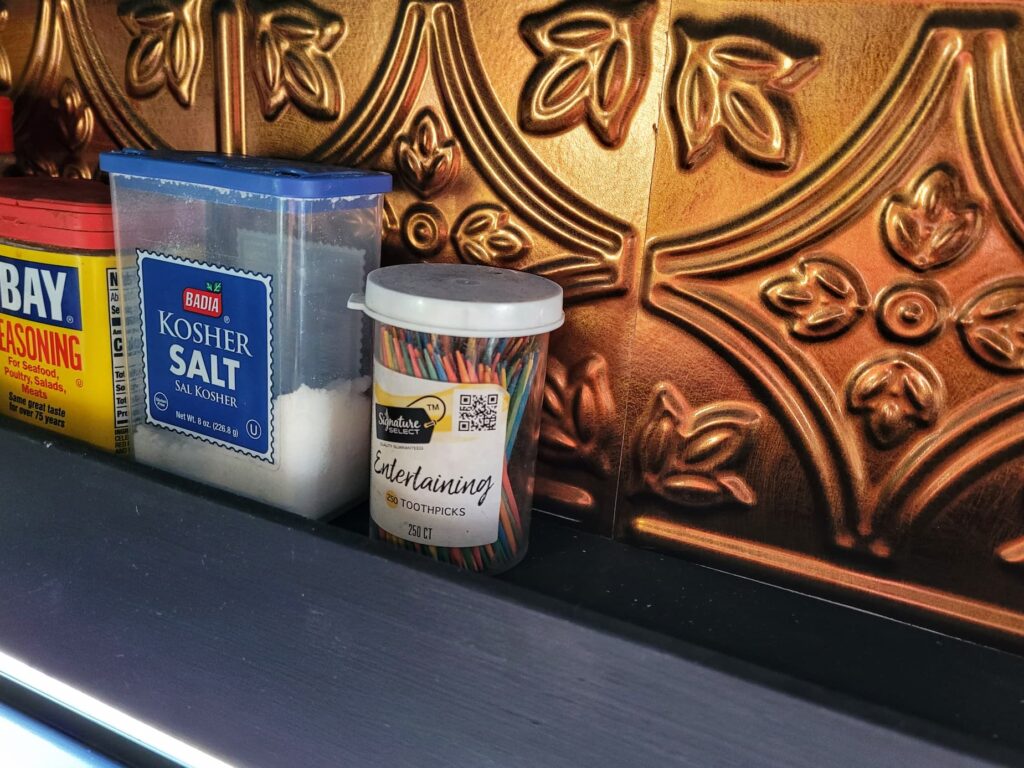
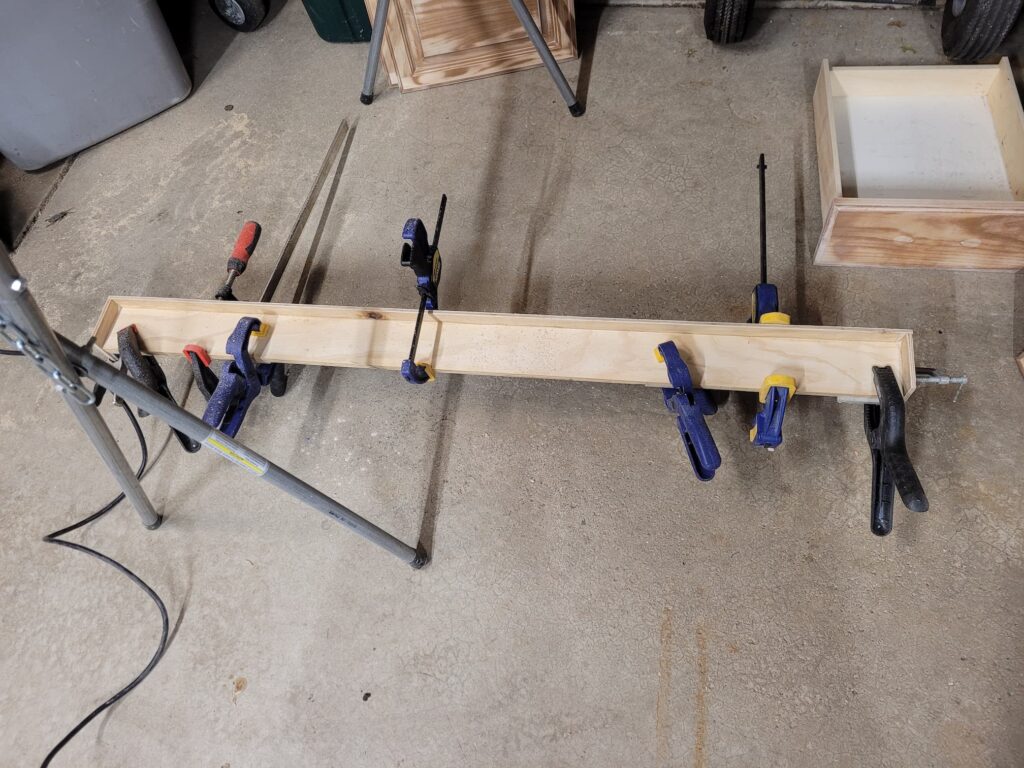
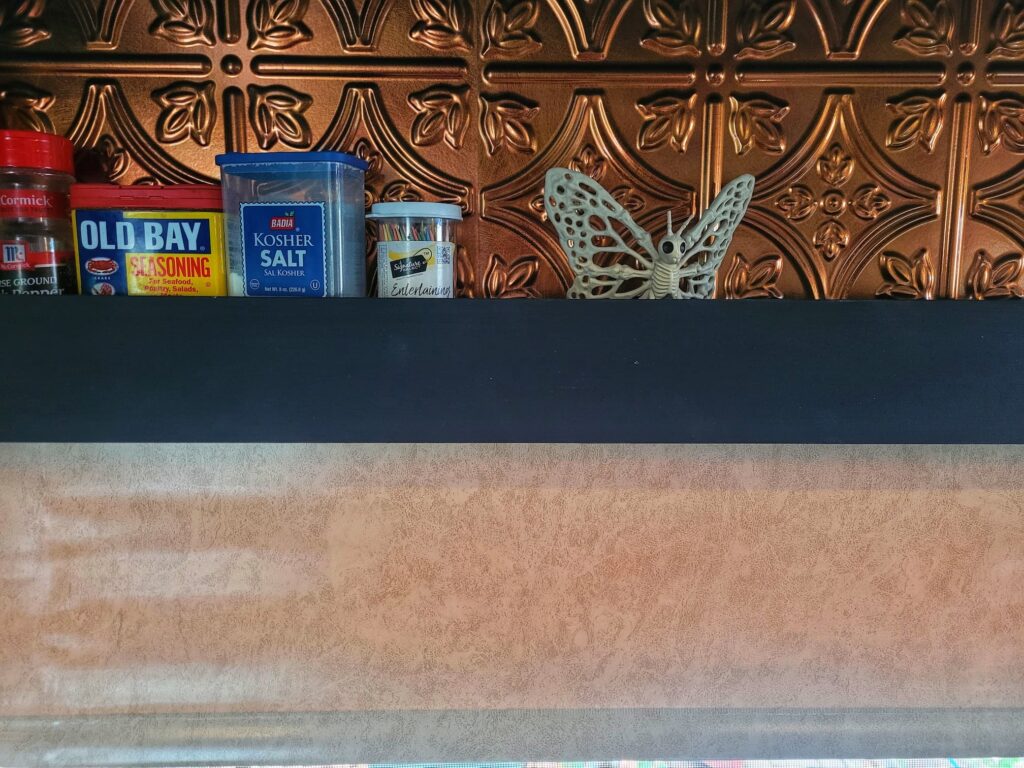
Building a Spice Shelf Window Valance
One of the best things we did to improve the overall aesthetics of the RV, and to remove weight, was to remove the old valances. For most of the windows, we installed curtains- but for fire safety reasons not in the kitchen. We still wanted something that would look nice and contain the shade when it’s up, so Josh built a new valance- with a bonus. Instead of just decorative, he built it with a shelf that we can use as a spice shelf and to store small misc. kitchen things we use regularly. This was another area I was worried about things falling during drives, but on our test drive everything stayed put!
We decided to just paint this black to match appliances and provide a neutral eye break. We would normally choose a more semi-gloss finish for paint, but once again mistints came in clutch and we found this black for $9/gallon at Menard’s. For replacing the actual blind, we got a vinyl roller shade cut to size. Again, not the look we quite wanted for it- but we’re cheap and this pattern was on sale for like 2/3 the price of other colors. Most the time we won’t see it anyways since during the day we usually have the window open.

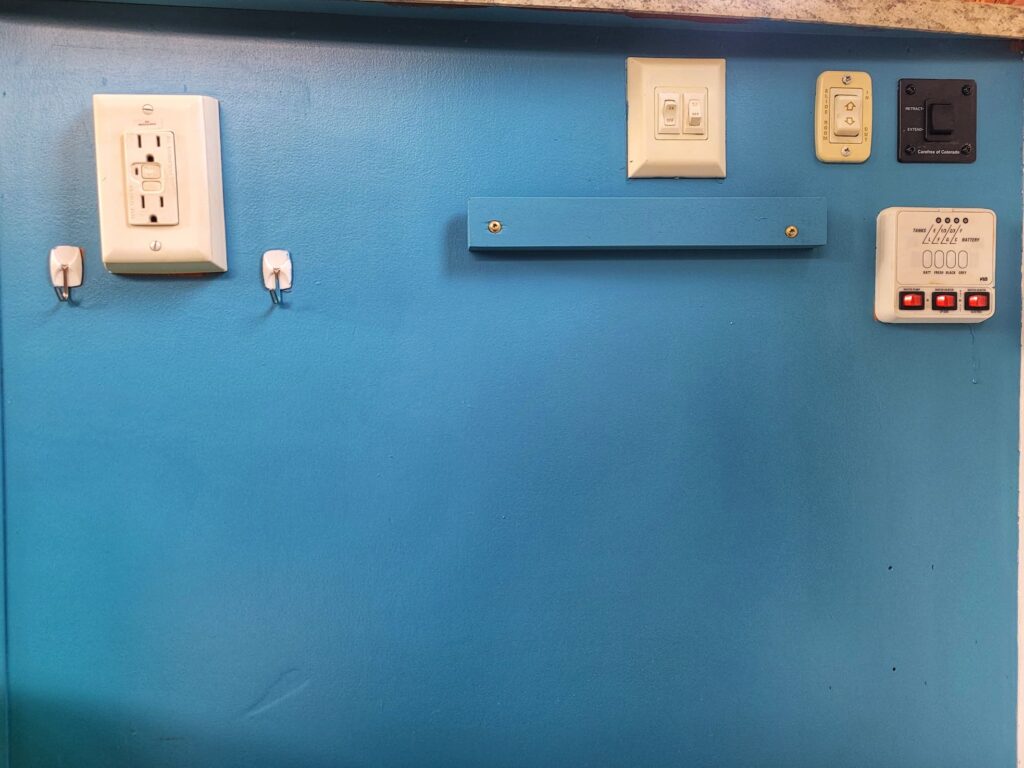
Adding Wall Storage in Our RV Kitchen
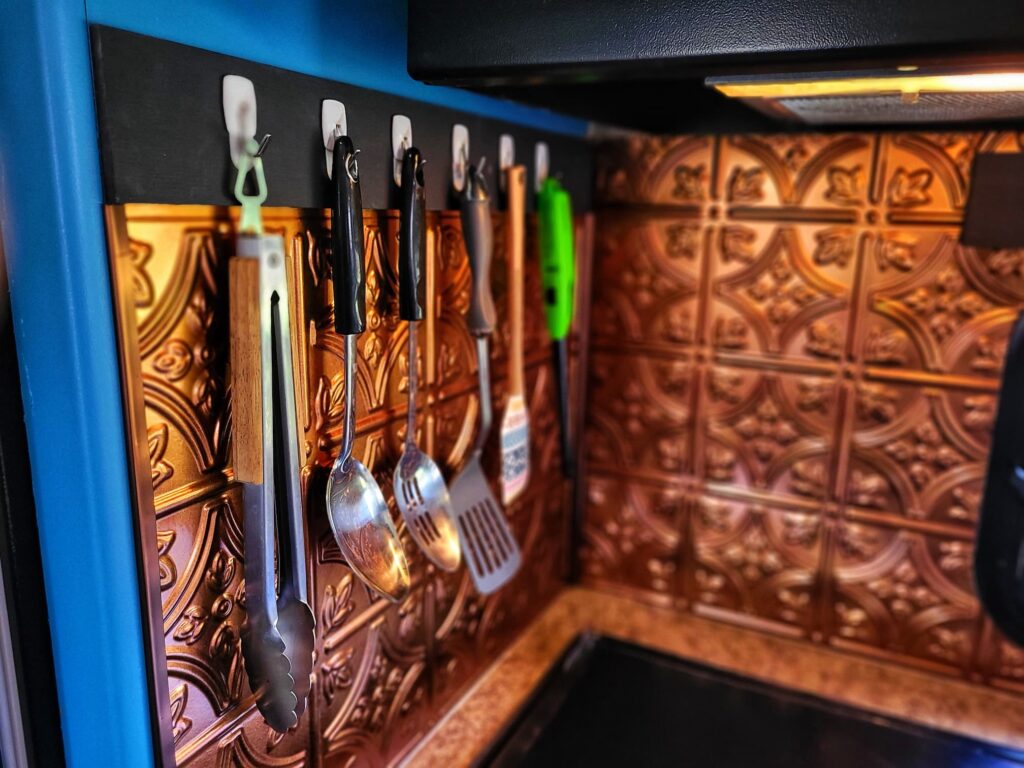
Next to the stove, Josh added a large trim board over the copper tile that we could use for utensil hooks. It’s really handy having our most commonly used tools out, but this saves counter space (also some of our larger spatulas literally don’t fit in the utensil drawer).
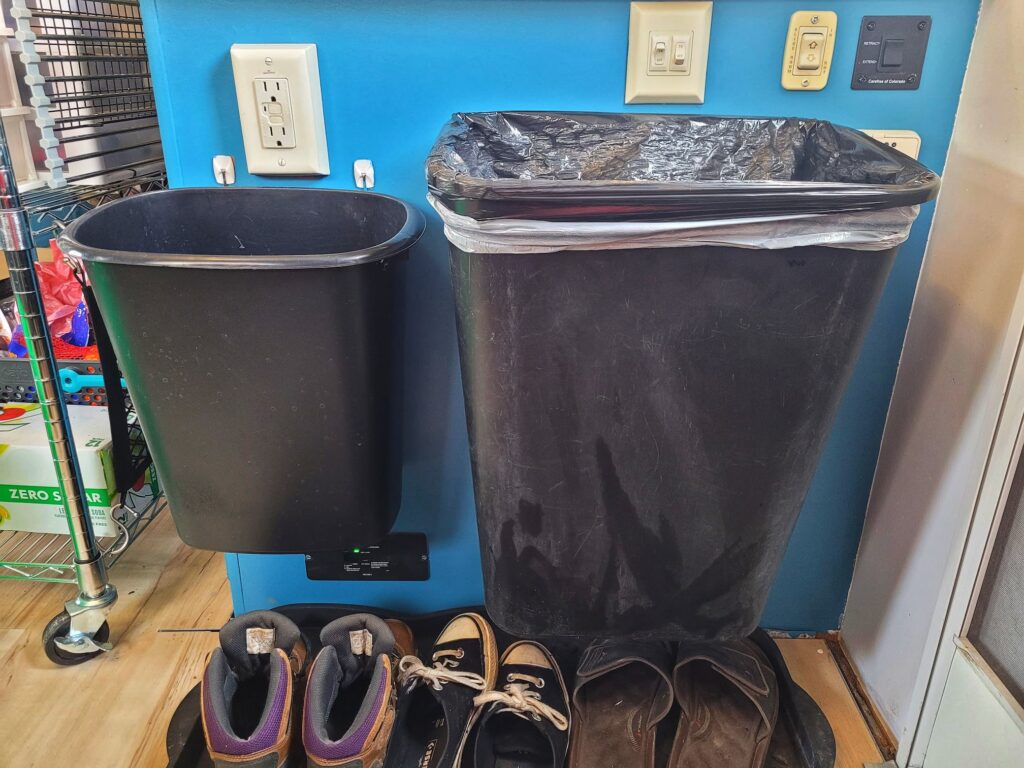
We keep our trash and recycling cans next to the kitchen counter next to the door. Josh came up with the idea to raise them up that way we can tuck shoes underneath. For the recycling bin we still have command hooks, but to add extra strength for the trash can he built a little ledge that the can hooks onto. This was also a success for our test drive- neither one fell down.
Our Favorite RV Kitchen Renovation Purchase: A Rolling Kitchen Island
Probably the thing we hate most in our kitchen is that the sink is at a stupid angle which means tons of wasted counter space. Seriously, why do they do this? When we went to the Chicago RV show we saw a lot like this and it’s mind boggling. Every other RV with the sink square actually has counter space. We have a table that hooks onto the cabinet to extend the counter space, but I hate it. It feels like there’s no room left when it’s up and it blocks access to all the storage on that part of the cabinet. So we wanted to find another option.
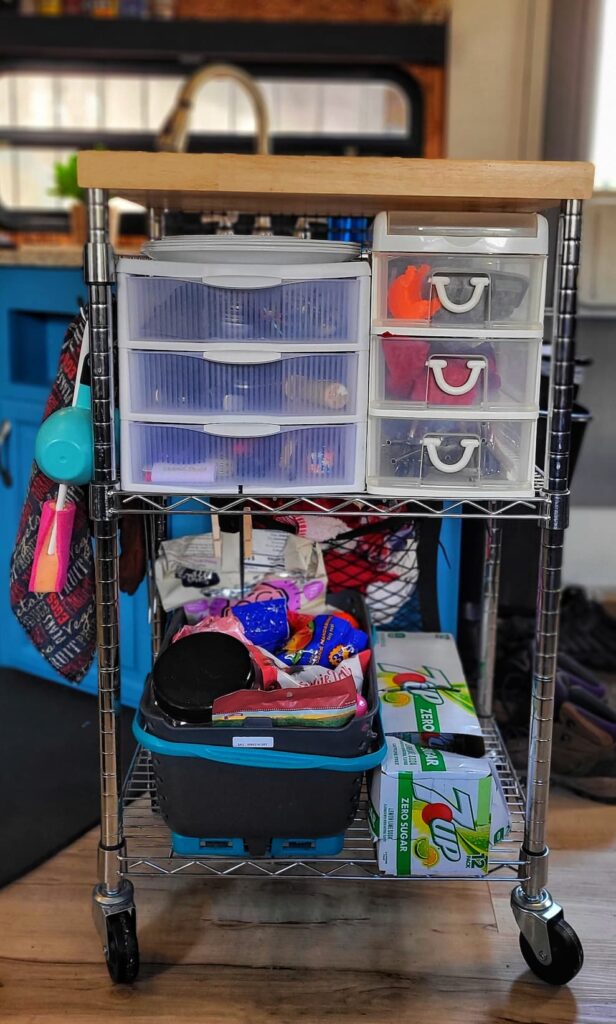
We ended up finding this Amazon Basics kitchen storage cart and love it. It gives us just enough more counter room and lots of extra storage space. It can be wheeled around, so it doesn’t feel like it’s taking up the whole floor. On the first shelf we put two plastic drawer units (that are ziptied down). The left one has cooking utensils, knives, and the 5,000,000 lighters we found while moving. The right one has misc. small kitchen stuff, napkins (we use cloth napkins for sustainability reasons), and eating utensils. This has been a great system for us. The bottom shelf we left more open, with just a basket on it, so we can store bulkier things. On one side it came with hooks, so we have potholder, measuring cups, and towels hanging here. On the back Josh added extra hooks so we can hang our dish rack and cooling rack. For moving days we roll this in front of the fridge with the drawers facing the wall and lock the wheels.
Tips, Tricks, and Lessons Learned
If you’re looking to start an RV kitchen renovation, there is tons of inspiration out there. We tried to lean more into an aesthetic that we might like in a house, instead of a more typical RV/vacation look. The most important thing for planning your renovation is to know your space and how you cook in it. Think about the tasks you do most often and find ways to keep the tools for those tasks easily accessible. Don’t just copy what others do, if it’s not how you use the space. Another big thing is to prioritize unitaskers in the kitchen and to downsize duplicates. Finally, as we learned with our fridge, things will go wrong- so be ready to adapt and change your plans. I feel like kitchens are always rooms where you’ll be changing and updating things as your needs change.
Our Future RV Kitchen Renovation Plans
So is our kitchen fully done? For now. We do have a few things we’d like to do in the future that aren’t priorities. One thing we’d like to do in the future is to somehow change up our counter. We won’t replace it, but we’ve thought about either painting it or doing the whole contact paper thing. We’ll see though. We were actually surprised with how much we liked our old cabinet handles with the new paint color, but we want to do something more unique. Our plan is to keep an eye out for unique vintage handles, or just cool items we can turn into handles. We’ll also be adding decor over time, as we find things in our travels that we love.