We’ve been full-time RVing for just shy of two years now, and in that time we’ve really figured out what works for us when it comes to our outdoor setup. Some of our gear we’ve had for years from our weekend camping days, some of it was inherited (and very well-loved), and plenty has been upgraded or replaced along the way. The truth is, your setup is always evolving- you find out what you actually use, what holds up, and what’s worth investing in.
In this post, I’m walking you around the outside of our rig and sharing the gear we use every day, plus a few tips and mini reviews. Some things we absolutely love, and a few we’ve learned from trial and error, but all of it has made our outdoor RV life a little easier and more comfortable.
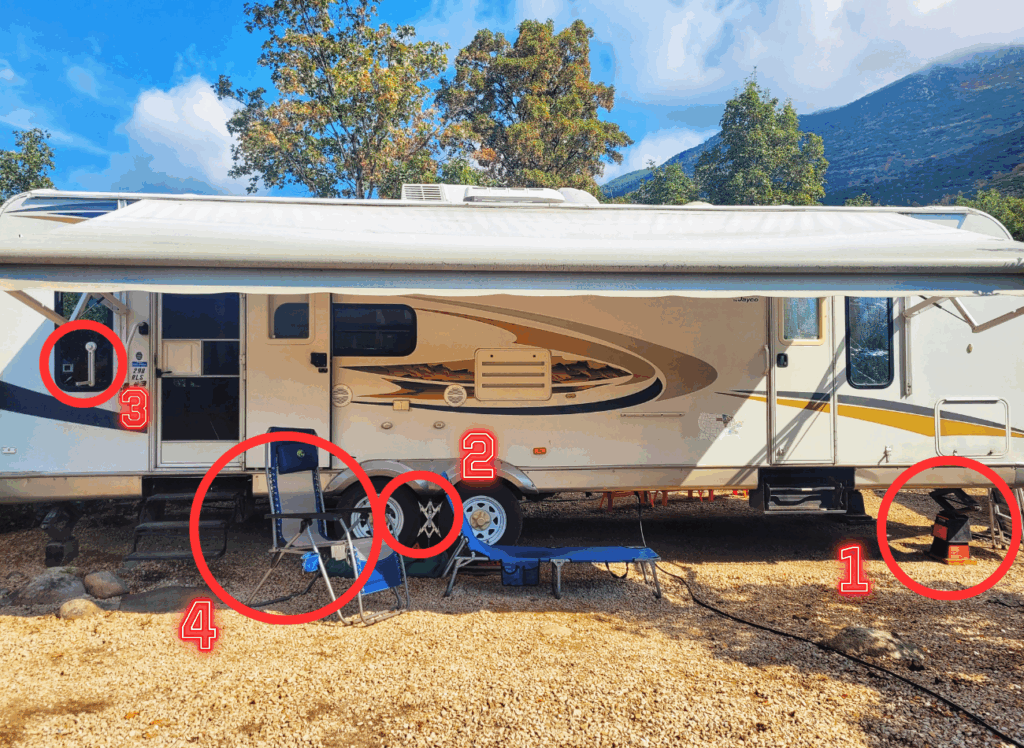
(1 & 2) Chocks, Blocks, & Leveling Gear
One of the first things we set up when parking the RV is all of our stabilization and leveling gear. It doesn’t sound exciting, but trust me, getting your rig level and stable makes a huge difference for comfort (and sanity). Over time, we’ve tried a few different setups and upgraded as things wore out, so here’s what we use now:
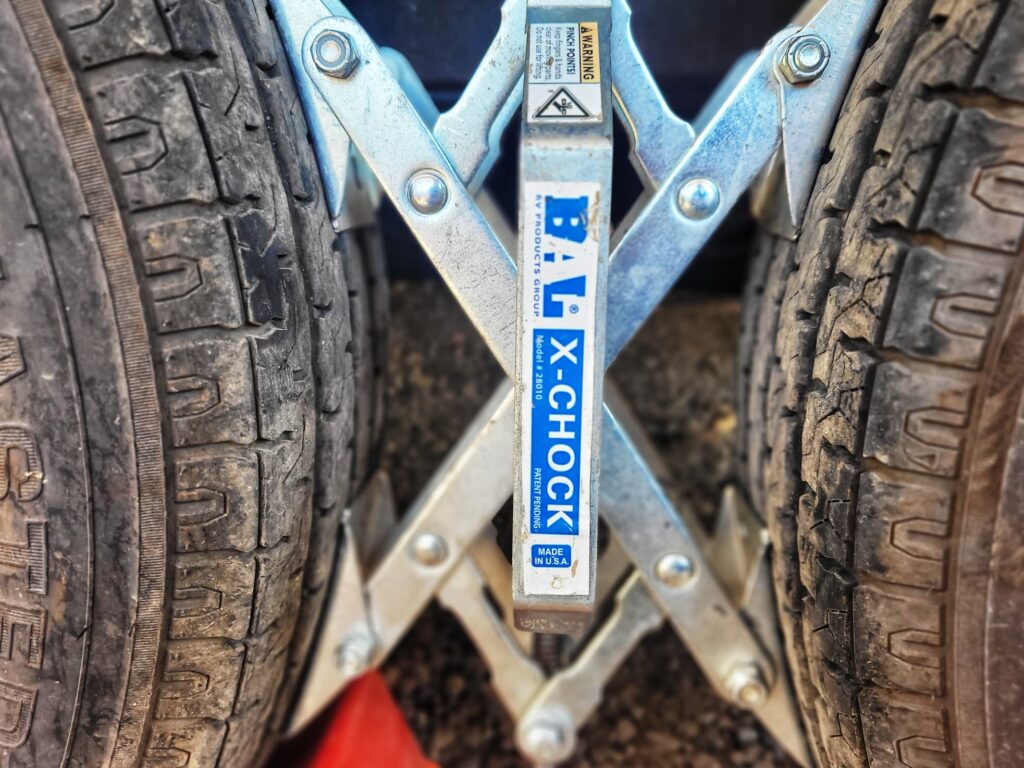
BAL X-Chock Wheel Stabilizers
We love these because they keep the camper from rocking side to side when we’re walking around inside. The BAL X-Chock sits between your tandem tires and applies opposing force to reduce tire shift and sway. They’re sturdy, made in the USA, and the kit even comes with two chocks and a ratchet wrench, so you’re ready to go right out of the box.
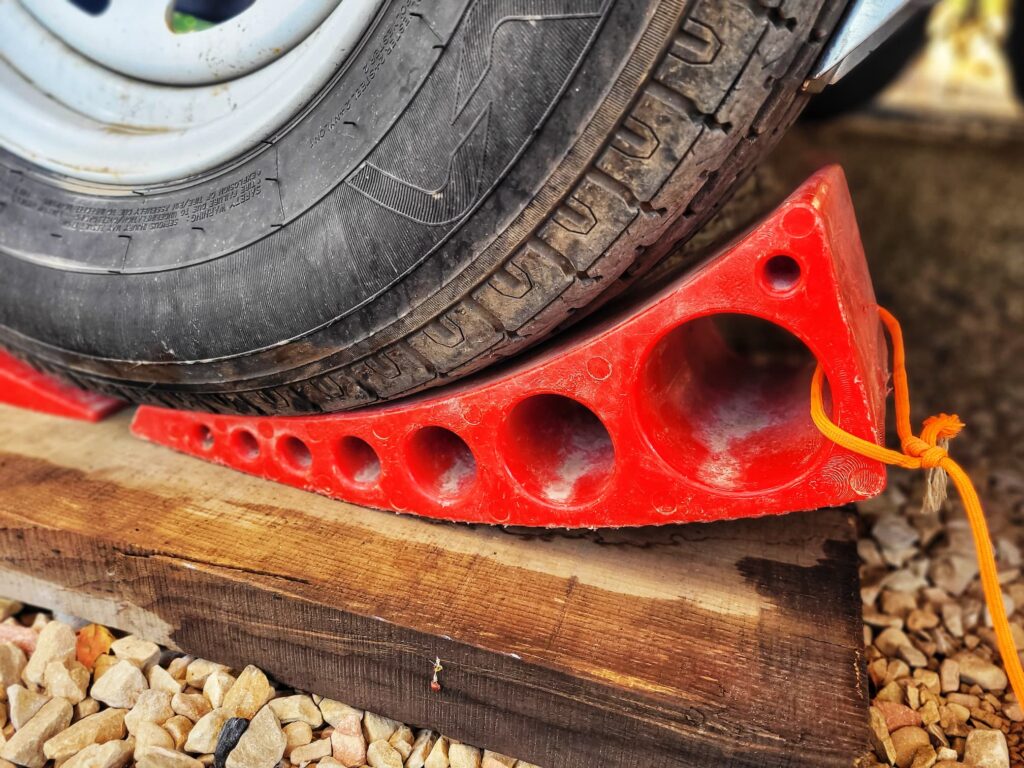
Andersen Camper Levelers
These are game changers for quickly leveling side to side. Instead of stacking blocks under your tires, you just drive up onto the curved levelers until your RV is where you want it, then pop a chock in place. The kit comes with two sets of levelers, rubber mats, and a carry bag. In this photo, you’ll notice we have ours sitting on boards- this site had really deep gravel, and the boards helped keep the Andersen levelers from sinking. On paved or smaller gravel sites, we usually don’t need the extra support.
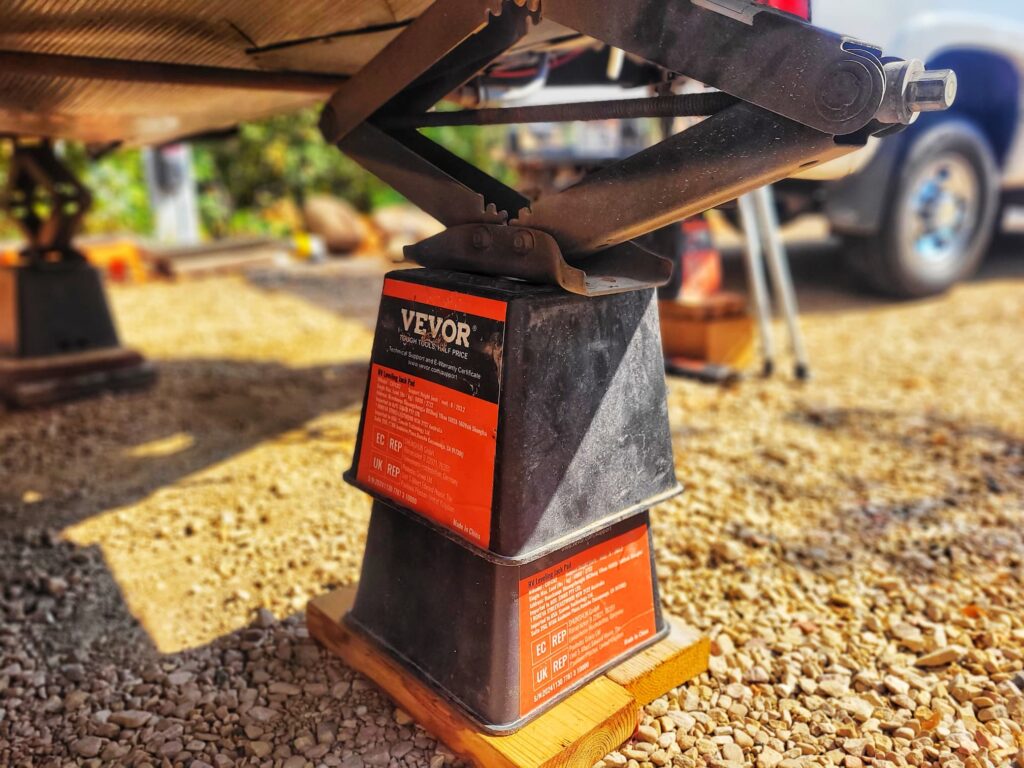
Vevor Trailer Jack Blocks
Before last Christmas, we were still using old wood blocks under our jacks, but they were falling apart and heavy to lug around. Josh got these Vevor jack blocks as a Christmas gift (yes, RV life = practical gifts!). They’re sturdy with a 6,000 lb capacity per block, stackable for extra height, and give your jacks a wider footprint for more stability. Plus, they’re lightweight compared to wood, which makes setup easier.
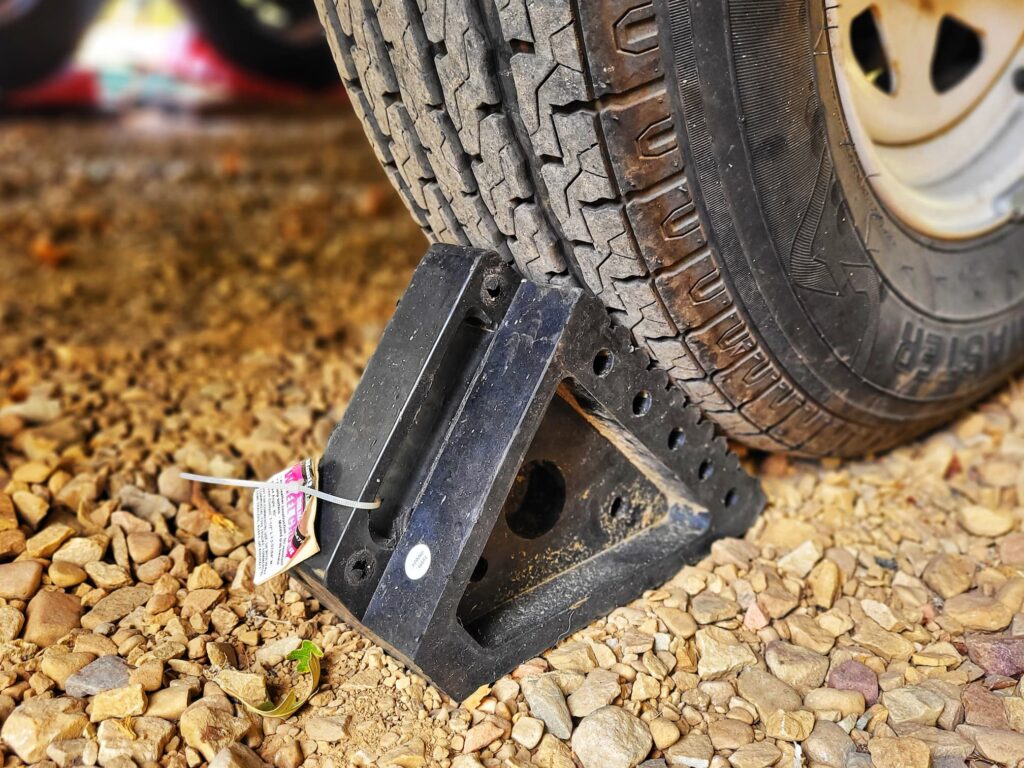
Haul Master Solid Rubber Wheel Chocks
We recently upgraded our wheel chocks too. The old ones had been with us since before full-time RVing and were worn out. These Haul Master chocks are solid rubber with a nonslip surface and a molded grab handle, so they’re both sturdy and easy to move around.
(3) Clothes Drying Rack
One of the less glamorous but super practical parts of RV life is laundry. Since we do a lot of hand washing, we keep a folding clothes drying rack with us. It suctions right onto the RV, so we can hang clothes outside without stringing up a full clothesline. That makes it campground-friendly in most places, even when clotheslines aren’t allowed.
It’s not perfect, it does fall off once in a while, but overall it works really well and saves us from having damp clothes hanging inside the rig.
(4) Camp Chairs
No campsite setup is complete without a good place to sit. We each have our favorites, and they’re pretty different from each other.
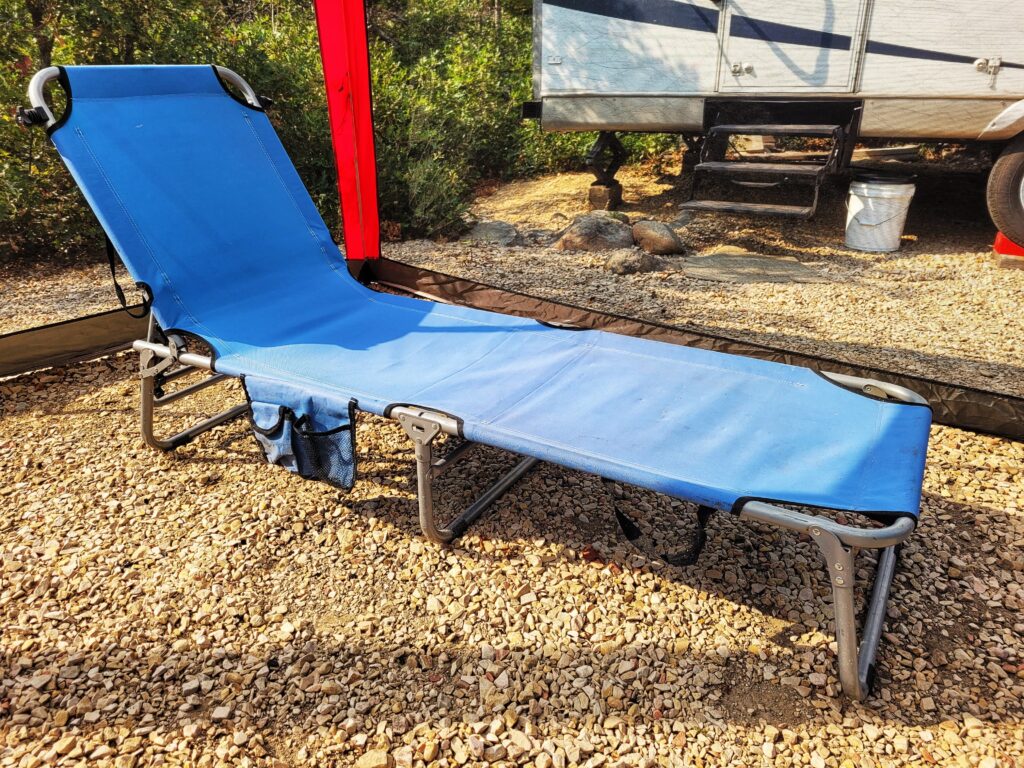
GYMAX Folding Lounge Chair with Canopy Shade
This one’s mine. I like being able to stretch out and read outside, and the lounge style is perfect for that. It technically came with a canopy shade, but honestly, it never worked right and I ended up just taking it off. Even without the shade, it’s still my go-to reading chair.
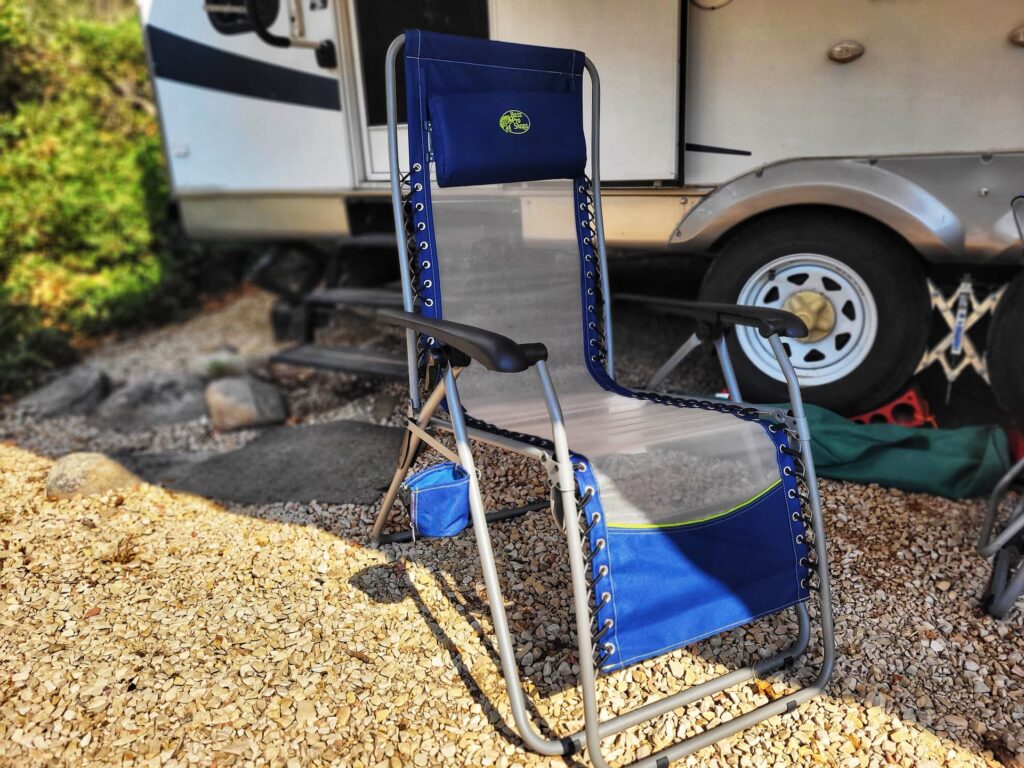
Zero Gravity Chair
Josh prefers a classic zero gravity chair- the kind that leans back and makes you feel like you’re floating. His is from Bass Pro, but you can find similar ones on Amazon like this Amazon Basics version. They’re comfortable for relaxing around the fire or even sneaking in a quick nap.
Screenroom
Funny enough, in between starting this post and finishing it, we finally set up our screen room for the first time. We’ve carried it around with us the entire time we’ve been full-time RVing and just never used it- until a swarm of wasps at one campsite made it a must.
I was surprised by how quick and easy it was to put up. The Coleman Instant Screenhouse (10×10) has telescoping, pre-attached poles, so it really is just a matter of unfolding and extending everything. I was even able to set it up by myself, which means we’ll definitely be using it a lot more going forward. It makes a great bug-free space to sit outside, eat meals, or just relax without swatting at wasps and mosquitoes.

Bonus: Our Outdoor Kitchen Setup
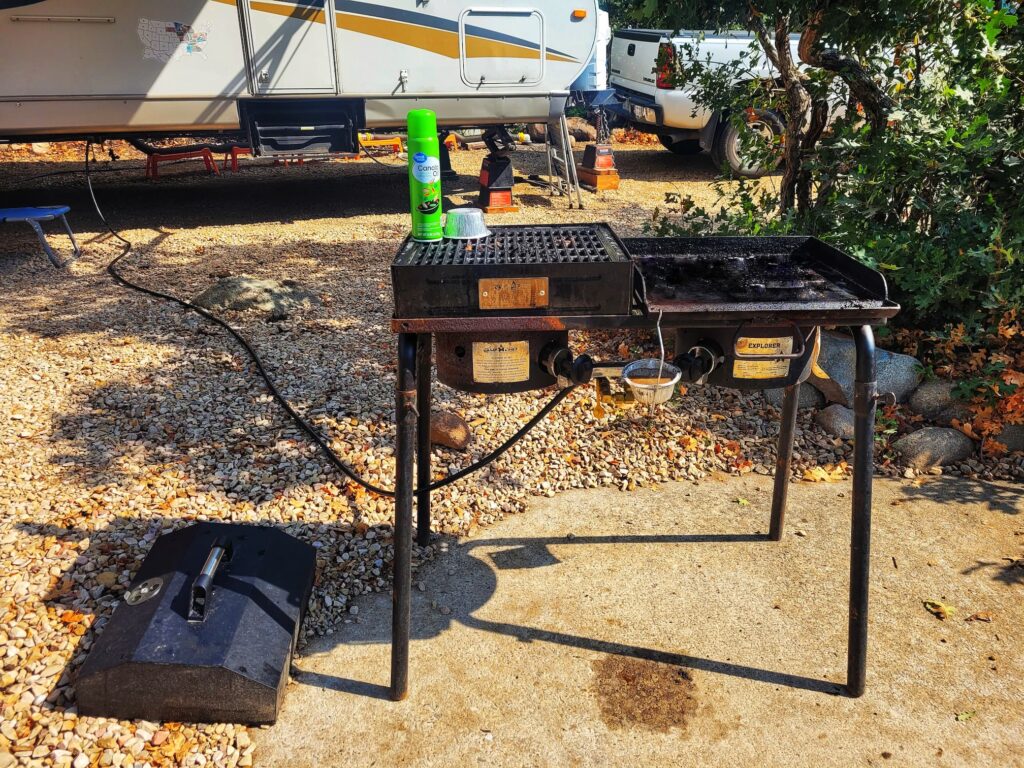
I’ll do a whole post sometime just on our outdoor cooking setup, but here’s a little sneak peek at what we use the most. We’ve cooked outdoors for years (Josh and I both used Camp Chef stoves with Boy Scouts back in the day), and honestly, they’re still our favorite. These stoves heat up super fast, they’re durable, and Camp Chef makes a ton of accessories so you can mix and match depending on how you like to cook.
Camp Chef Explorer 2-Burner Stove
This is the heart of our outdoor kitchen. Camp Chef makes a single-burner version, but we prefer the two burners so we can multitask- boil water on one side while using a skillet or griddle on the other. We’ve got ours tied directly into our RV propane, which makes it even easier to use.
Camp Chef Deluxe Griddle
We started with this single-burner griddle attachment and use it all the time. We try to cook outside when it’s hot out, and the griddle makes stir fries, eggs, bacon, and more way easier (and keeps the heat and mess out of the RV). Camp Chef also makes a two-burner version if you want more cooking space.
Camp Chef Deluxe BBQ Grill Box
This single-burner grill box turns the stove into a little outdoor BBQ. We used to have Camp Chef’s Professional Grill Box (the fancier version), but Josh actually prefers the Deluxe because the lid comes completely off, it’s easier to use that way.
Camp Chef Accessories Wishlist
One of the best things about Camp Chef is all the accessories you can add on. They’ve got everything from Dutch ovens to pizza ovens. The pizza oven attachment is definitely at the top of my wish list-it would be so fun to do make-your-own pizza nights at the campsite.
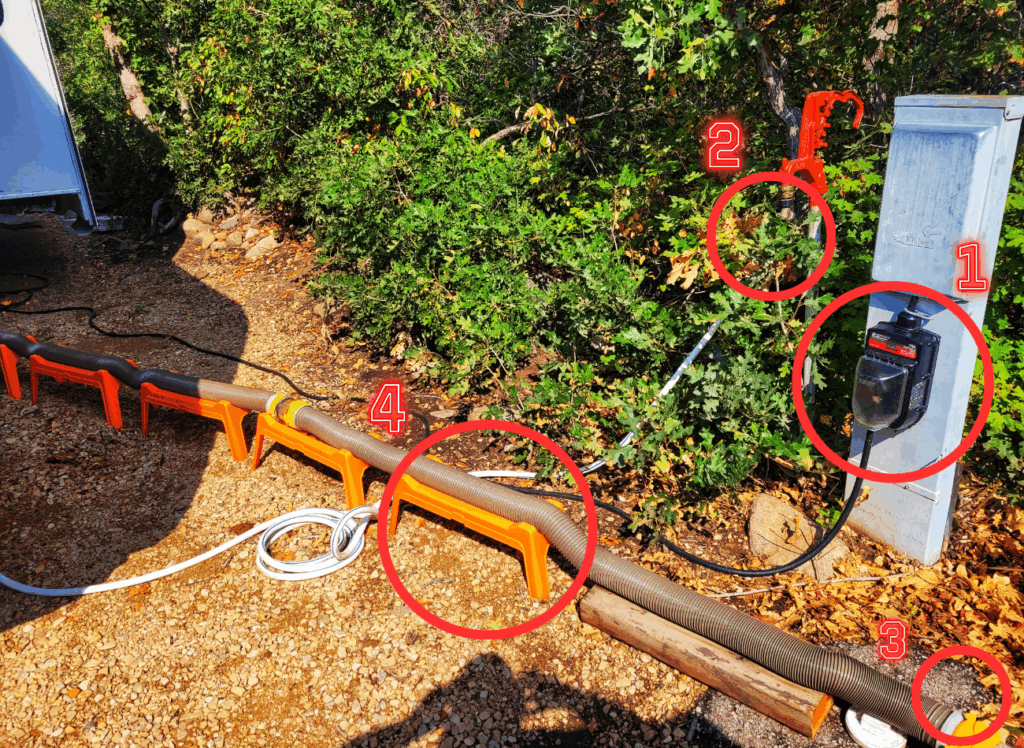
The Backside: Power, Sewer & Water Setup
On the utility side of the camper, we’ve learned that having the right gear makes hookups faster, cleaner, and way less stressful. Here’s what we use to keep things running smoothly:
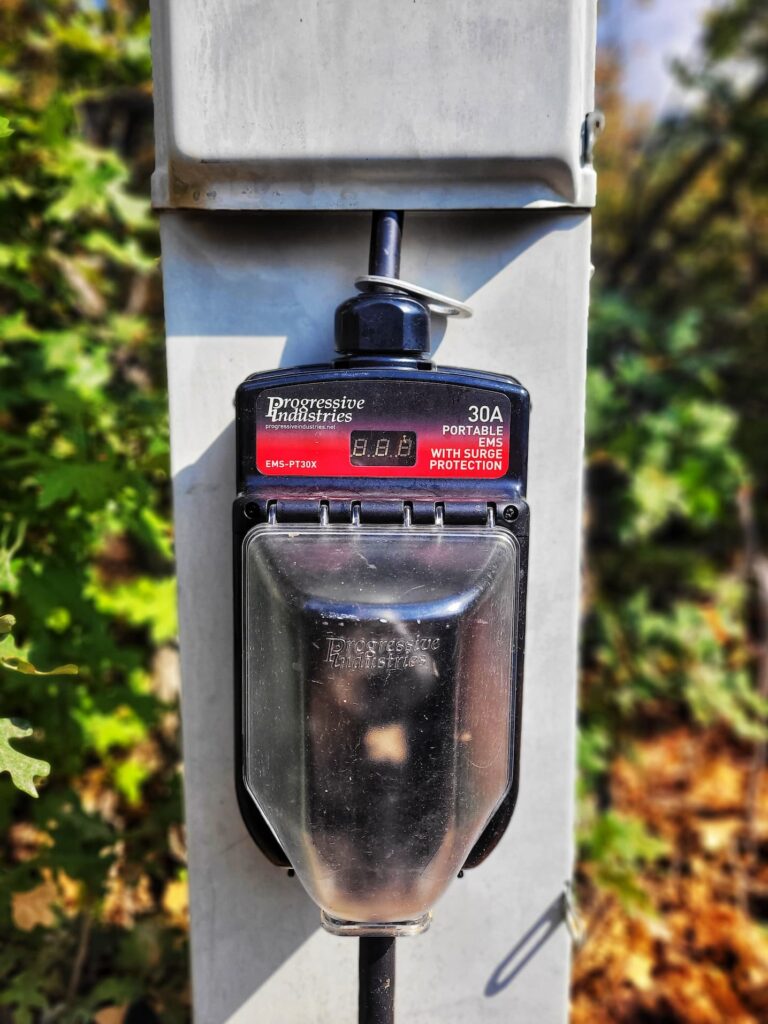
(1)Progressive Industries Portable RV Surge Protector
A surge protector is non-negotiable for us. It only takes one bad power pedestal to fry your RV’s electrical system, and that’s an expensive mistake. We use the 30-amp Progressive Industries surge protector (they also make a 50-amp version). It absorbs surges up to 1790 joules, protects against over/under voltage, and has built-in fault detection. I also like the integrated display, it’s a quick way to check what kind of power we’re getting. Bonus: it has an all-weather shield, so you can leave it plugged in rain or shine.
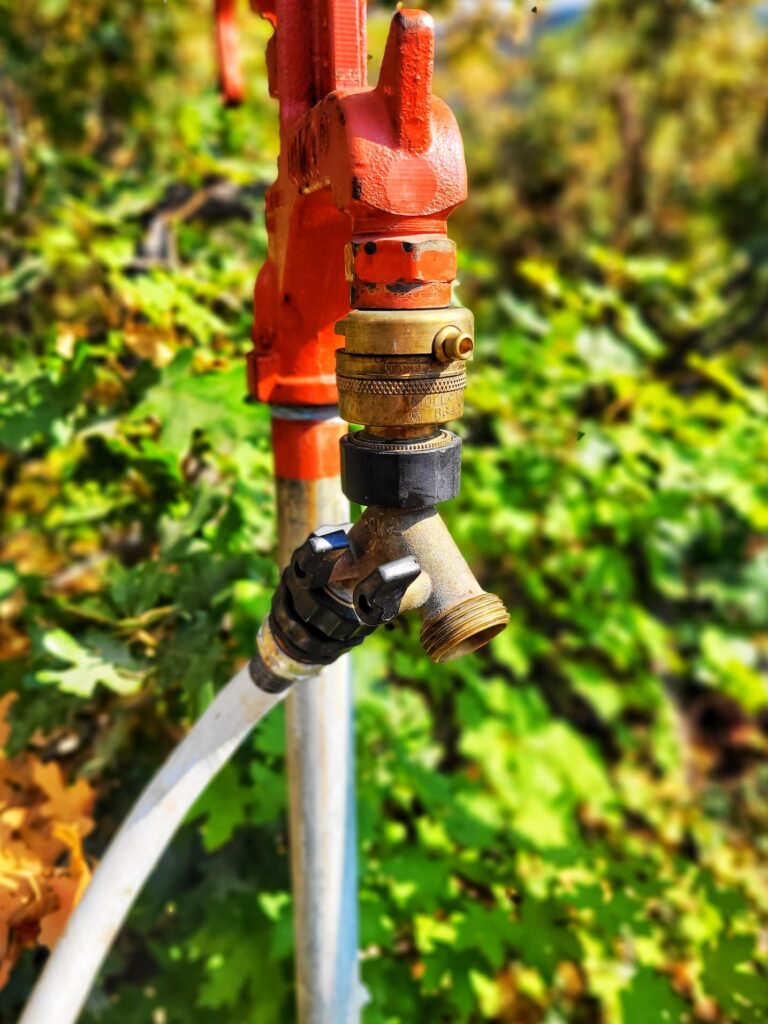
(2) 2-Way Hose Splitter
We always keep a hose splitter on our water hookup. One side is dedicated to drinking water for the RV, and the other side is free for rinsing out the sewer hose or any other quick tasks.
(3) Camco Revolution RV Sewer Hose Bayonet Elbow
This is the piece that goes into the drain. It creates an odor-tight connection thanks to a built-in gasket, and it fits all Camco sewer hoses. The universal 4-in-1 adapter works with most dump station inlets, and the 360° rotation makes it easier to hook up.
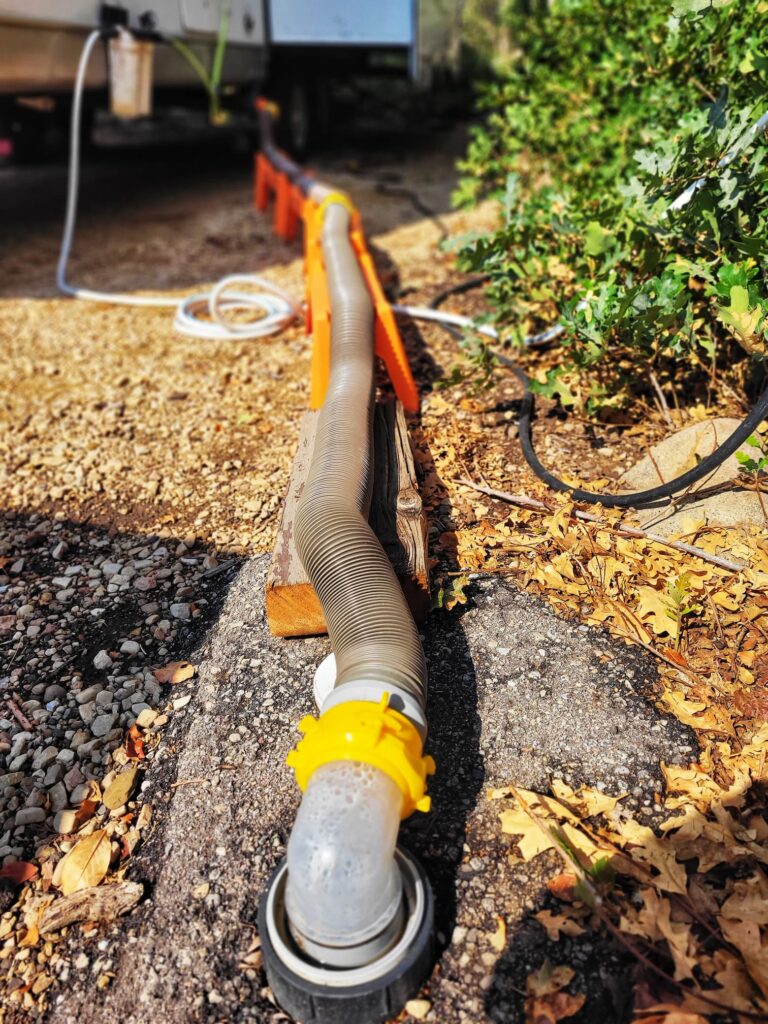
(4) Camco Revolution Sewer Hose
Not the most glamorous part of RV life, but a good sewer hose makes dumping a lot less messy. We keep multiple hoses on hand in case the hookup is farther away. The Camco Revolution hoses are durable, flexible, made in the USA, and the 360° swivel fittings make them easier to maneuver. They also compress down for easy storage, which helps save space.
Camco Rhino RV Sewer Hose Support Kit
For years we used the accordion-style supports, but they were bulky and awkward. We recently switched to the nesting Camco Rhino kit, and it’s way better. The supports come in different heights so you can customize the slope, and they nest neatly together when not in use.
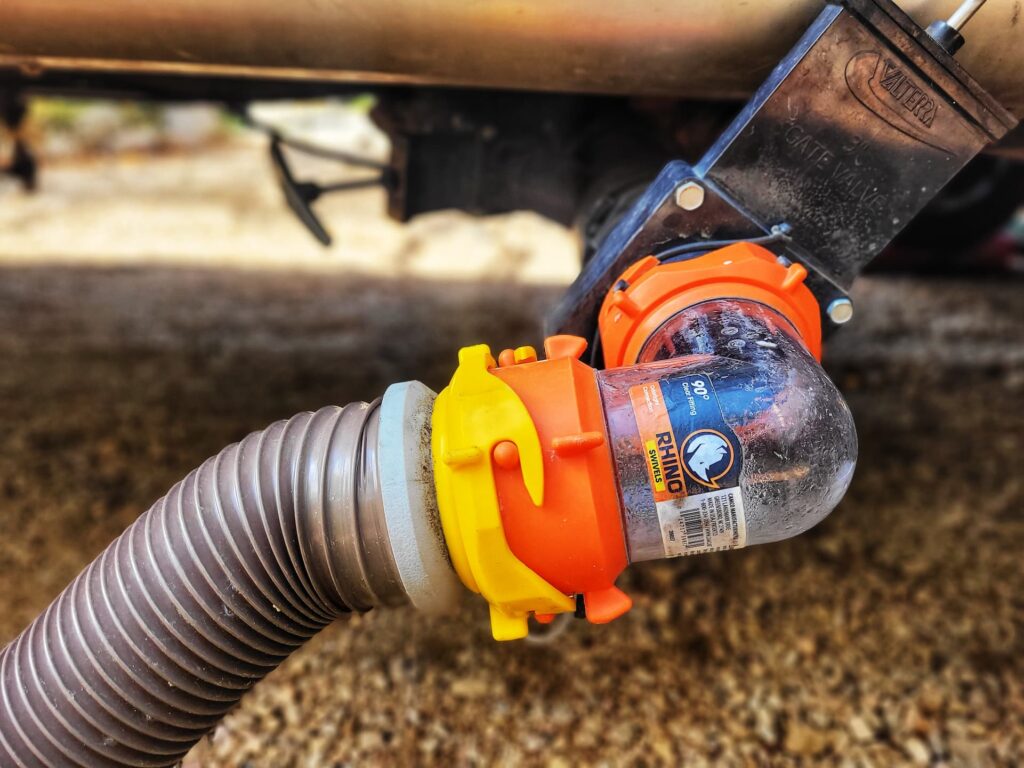
Camco RhinoFLEX Clear 90° Sewer Hose Fitting
We use this one on the RV side of the hose. Since it’s clear, you can see when things are fully drained (super helpful, if a little gross). It also has swivel and bayonet fittings for a secure, no-leak connection.
Beech Lane External RV Dual Water Filter System
There are lots of ways to filter water, but we’ve been using this dual canister setup. It uses a 5-micron and a 0.5-micron filter for cleaner water, and the lead-free brass fittings are heavy-duty for RV use. Replacement filters are easy to find in-person, which is great for when we’re in areas with no Amazon lockers.
Flexzilla Garden Hose (3 ft.)
This short little hose connects the filter to the city water input. It’s flexible, lightweight, and drinking water safe. Plus, the leak-free fittings have held up great.
Camco TastePURE 50 ft. Drinking Water Hose
This is our main freshwater hose. It’s lead-free, drinking water safe, and just works- nothing fancy, but reliable.
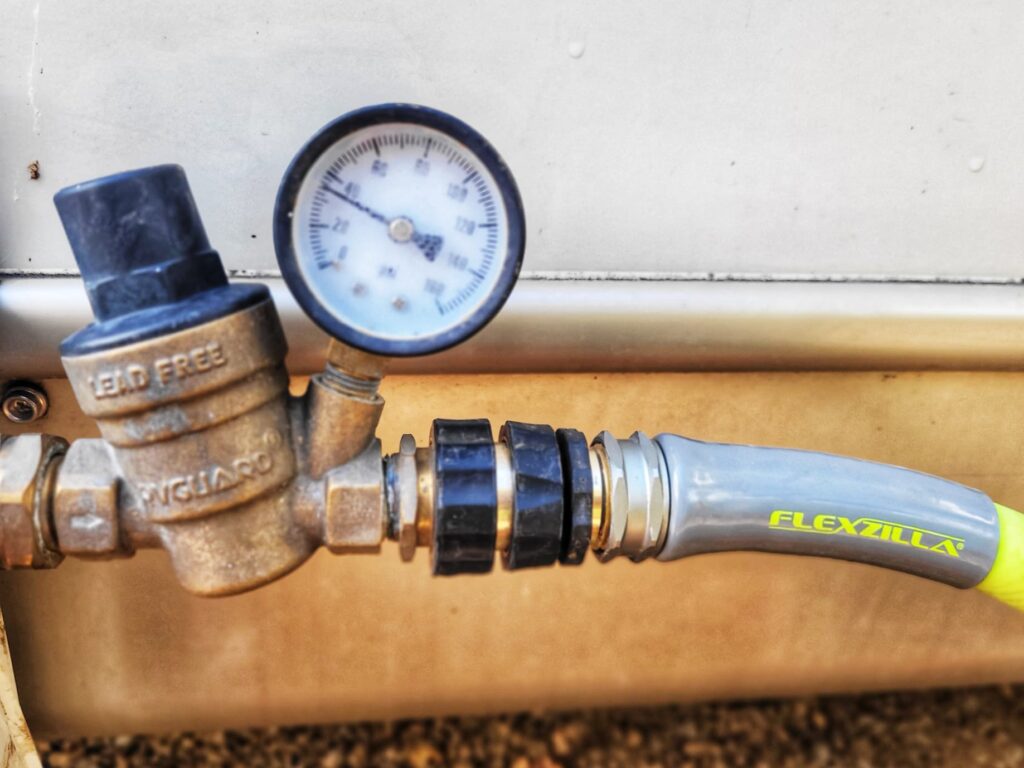
RVGUARD Water Pressure Regulator with Gauge
A pressure regulator is a must to protect your RV’s plumbing from high water pressure at campgrounds. This one is adjustable, lead-free brass, and has a built-in gauge so you can monitor it at a glance.
Hose Quick Connects
We’ve added quick connects to all our hoses, and honestly, I’ll never go back. It makes setting up and tearing down way faster, just snap the hoses on and off without all the twisting.
Wrapping Up Our Setup Tour
After almost two years on the road, we’ve discovered that having the right outdoor gear makes a huge difference in both comfort and convenience. Some of these items were quick wins, and others we figured out after a little trial and error (and replacing older, bulkier gear). And while we’ll probably keep tweaking our setup as we go, these are the staples we rely on right now.
Hopefully this gives you some ideas for your own RV setup, whether you’re just starting out or looking to upgrade a few things. The great part is, every RVer’s setup looks a little different, but finding what works best for you makes all the difference in feeling at home on the road.
As Amazon Associates, we earn on qualifying commissions.